步进电机是一种将电脉冲转化为角位移的执行机构。通俗一点讲:当步进驱动器接收到一个脉冲信号,它就驱动步进电机按设定的方向转动一个固定的角度(及步进角)。你可以通过控制脉冲个数来控制角位移量,从而达到准确定位的目的;同时你也可以通过控制脉冲频率来控制电机转动的速度和加速度,从而达到调速的目的。
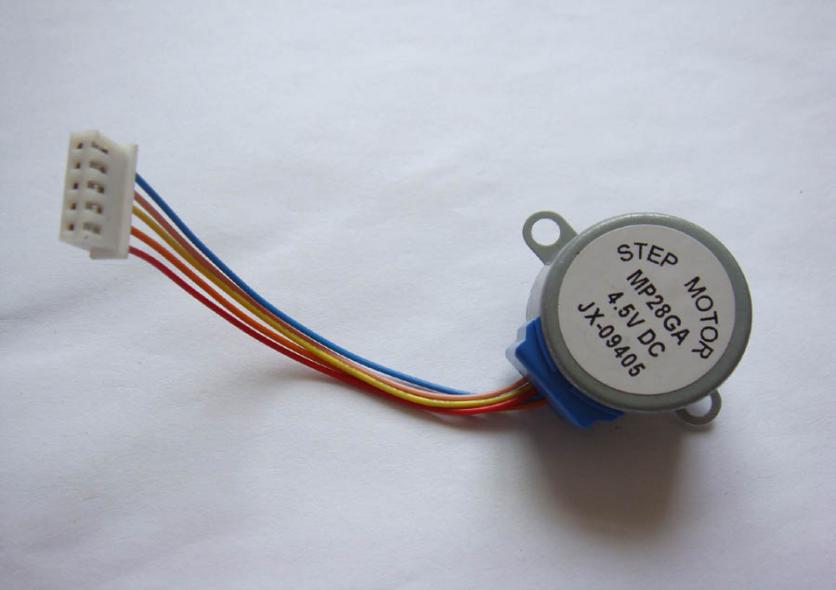
下面这个就是本次实验使用的步进电机

使用步进电机前一定要仔细查看说明书,确认是四相还是两相,各个线怎样连接,本次实验使用的步进电机是四相的,不同颜色的线定义如下图:

减速步进电机
- 直径:28mm
- 电压:5V
- 步进角度:5.625 x 1/64
- 减速比:1/64
- 5线4相:可以用普通uln2003芯片驱动,也可以接成2相使用
该步进电机空载耗电在50mA以下,带64倍减速器,输出力矩比较大,可以驱动重负载,极适合开发板使用。注意:此款步进电机带有64倍减速器,与不带减速器的步进电机相比,转速显得较慢,为方便观察,可在输出轴处粘上一片小纸板。

步进电机(五线四相)驱动板(UL2003)试验板
步进电机驱动板(UL2003)试验板
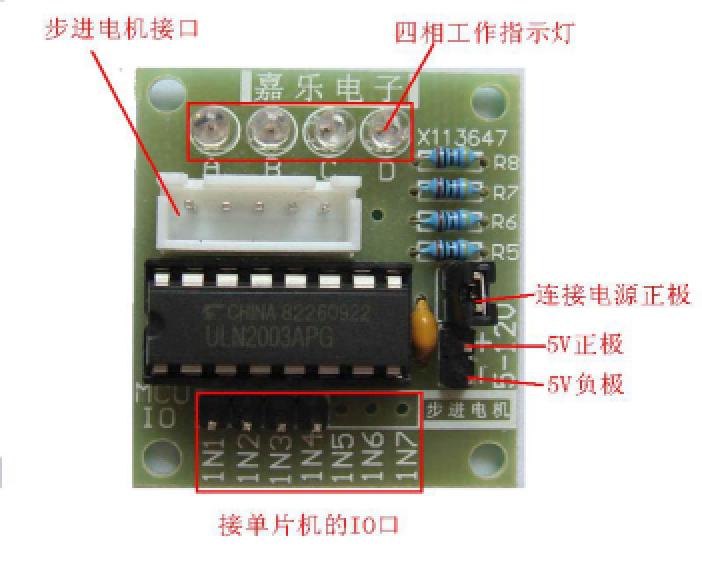
外形尺寸:31×35mm
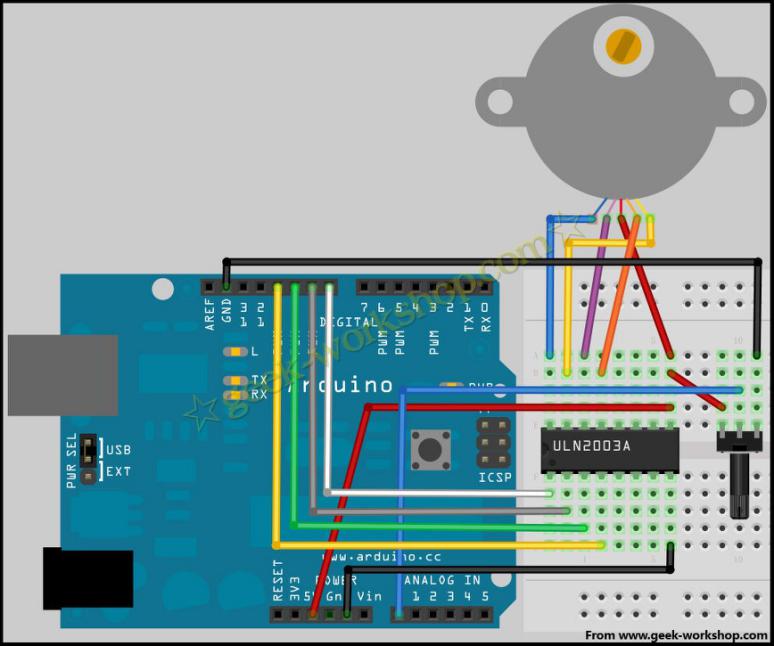
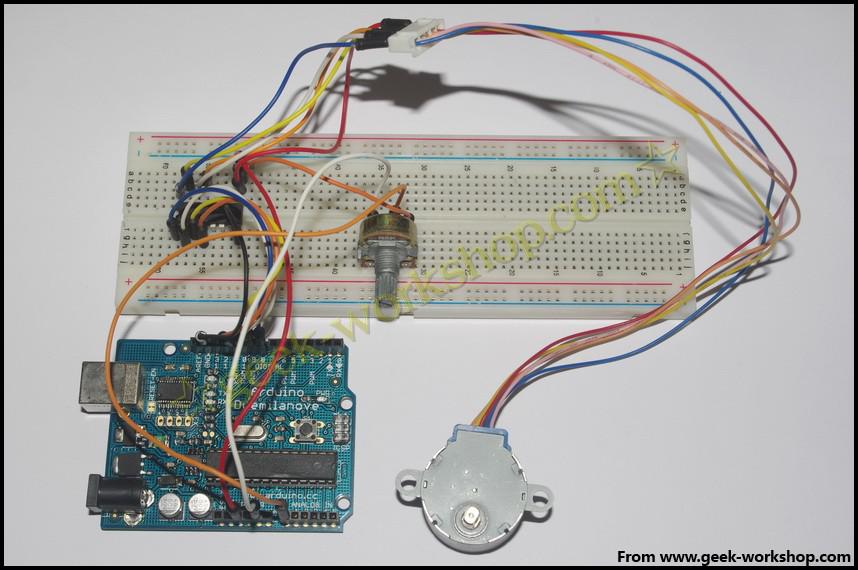
硬件连接图如下
Source Code:
1 | #include <Stepper.h> |